
Smart Video Splitting: Choose Modes and Review Every Cut
Author
Date published

Smart video splitting turns existing recordings into clips you can inspect and reuse. The right boundary depends on the next task: a visual cut may identify a shot, a fixed interval may organize length, and a spoken passage may need a complete thought. None of those boundaries automatically establishes that a clip is ready to publish. This guide explains how to choose a splitting mode, run a representative source, inspect the output and organize usable material without losing the original context.
Key takeaways
- The tool splits recorded video; use script generation when you need to plan scenes that have not been filmed.
- Choose among transition, fixed-duration, desired-count, speech-based and AI precise-transition modes according to the boundary you need.
- Imported files still need to be selected for the task, with required parameters and an output directory set.
- Review every retained clip for complete actions and spoken context, then preserve its original source reference.
Distinguish video splitting from writing a storyboard
The workflow described here starts with a recorded video file and produces candidate clips. It helps separate material you already have. The smart splitting overview describes the tool’s role.
A written storyboard plans scenes that have yet to be filmed. If you need to develop that plan from a topic or brief, use the AI Script Generator. Pasting a script into the video splitting workflow does not supply source footage.
Decide what the output is for before choosing a mode. A footage library needs reusable actions and clear source references. A spoken highlight needs enough context to make sense independently. A batch-editing group needs clips that can substitute for one another under a specific line.
Boundary rule: A useful cut preserves the visual action or spoken meaning required by the next edit, even when that means using a different boundary from the automatic result.
Keep the original recording available. The clips are working material, and a later edit may need frames or words just outside the selected range.
Prepare one source and define a useful clip
Choose a representative recording you can watch and evaluate before applying the same approach to more material. A source with clear cuts tells you something different from an uninterrupted talking-head take.
Step 1: Inspect the source
- Play the original from beginning to end or inspect the relevant passage with enough surrounding context.
- Note visible shot changes, complete actions and spoken topic changes.
- Identify which material is useful for the next editing task.
- Decide whether the original sound should remain part of the clip.
- Keep the source file and choose a distinguishable output location.
Write a short clip rule: “Keep the whole lid-opening action,” “Keep each complete answer,” or “Prepare equal-length review segments.” These rules produce different choices. A generic instruction to split the video leaves the important editorial decision unstated.
Check the source plays correctly and the app accepts it. The implementation reviewed on October 10, 2026 excludes files at or above 2 GiB (2 × 1024³ bytes) during selection, although the interface labels the threshold as “2 GB.” Per-task file counts depend on membership rights. Check the installed client for current limits and charges. If selection fails, diagnose that input issue before changing scene-detection settings.
The preparation step is complete when you can name the source, explain the intended use and describe what must survive at both ends of a clip.
Choose among the five splitting modes
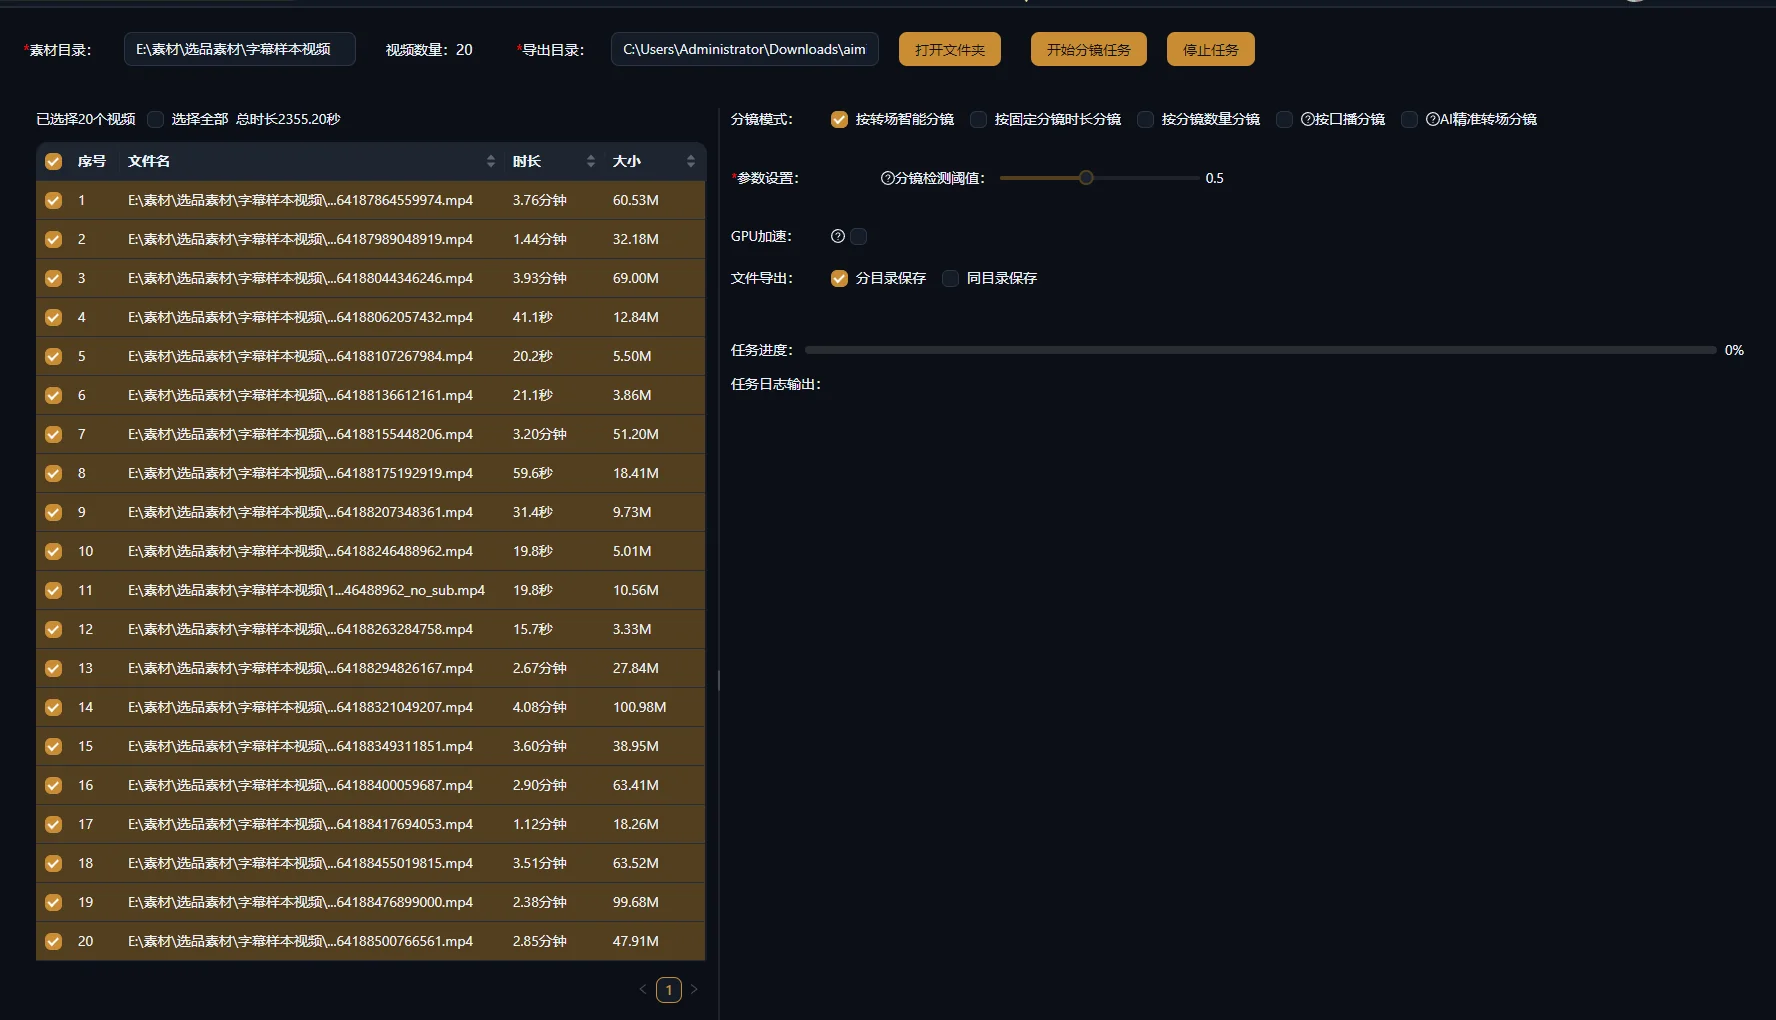
Choose the mode by the boundary you need, rather than assuming one mode is best for every recording. The current tool exposes five modes. Their labels below describe their purpose; wording can differ with the client language.
| Mode | Suitable starting material | Parameter or prerequisite | Required review |
|---|---|---|---|
| Transition splitting | A compiled video with distinct visual shots | Detected visual changes | Check missed transitions, extra cuts and action continuity. |
| Fixed-duration splitting | Comparable review ranges | Duration in seconds; current control accepts 1–300 | Check interrupted speech and actions crossing intervals. |
| Desired-count splitting | A source you want divided into a chosen number of pieces | Required output count | Check content boundaries; the count does not establish completeness. |
| Speech-based splitting | Spoken explanations or interviews | Human speech, caption timing and a suitable recognition model; an SRT input is available | Check recognized words, timing and complete thoughts. |
| AI precise-transition splitting | Visual-shot separation using the AI transition route | Cloud processing and usage charges shown in the client | Inspect boundaries; the mode name is not an accuracy guarantee. |
Scene detection concerns visual shot boundaries. Adobe’s Scene Edit Detection documentation describes identifying cuts inside a single video and separating shots for editing. That supports the distinction between a visual cut and a semantic answer; it does not establish that another client uses the same implementation.
A one-camera explanation can contain several topics without a visual transition. Conversely, an edited explanation can change camera angle in the middle of one sentence. Select a speech-oriented approach when the complete spoken idea is the priority, then verify its result.
Fixed intervals and desired counts are useful organizational boundaries. Treat them as candidate ranges, not evidence that every output contains a complete scene. Speech-based splitting uses caption timing and can consume transcription allowance or points; it is not simply visual scene detection with a different label.
Run a representative split and keep the output traceable
Run one source with a clear purpose and inspect its results before expanding the task. This creates an observable comparison between the selected mode and the boundaries you actually need.
Step 2: Configure and submit the task
- Open the video splitting tool and import the source video.
- Select the intended file in the imported file list; import alone does not select it for processing.
- Choose the splitting mode.
- For fixed-duration mode, enter seconds. For desired-count mode, enter the required count. For speech mode, check the recognition model and any supplied caption input.
- Choose the export directory and whether to save by separate directories or together in one directory.
- Submit the task and wait for the result.
- Open the resulting clips and compare them with the original.
Record the mode and the relevant setting alongside the source filename. If you later change the approach, retain enough information to understand why the second result differs. Do not rename the original out of recognition or mix clips from several attempts in one unexplained folder.
Your verification is whether the generated clips are accessible and preserve the material required by the clip rule. A task marked complete only confirms processing finished; it does not confirm that its boundaries meet the editorial goal.
If no transition is detected, the source may be an uninterrupted take. The current transition workflow can skip such material with a warning. Do not assume a missing transition means the video has no useful topic boundaries; choose a different approach when spoken content is the target.
When the output is unsuitable, inspect the source and selected mode before rerunning. A fixed interval that divides an action is a reason to revise the cutting approach or the boundaries, rather than submit the same interval again.
Inspect the beginning and ending of every retained clip
Play both edges of a clip in context. The thumbnail can show the right subject while the file omits the motion, word or qualification that makes the passage understandable.
Step 3: Review the visual action
Look for the setup, the action and its completion. In a product demonstration, the hand reaching for a mechanism may establish what happens next. A clip that begins halfway through the motion can be visually related but difficult to follow.
Inspect the first and last frames for remnants of an adjacent shot. Then watch normally to judge whether the action has enough room to be understood. For a close-up that will be used under narration, check whether its important detail remains visible for the relevant words.
Step 4: Review speech and meaning
Listen for clipped syllables and read the passage’s meaning. A sentence can be grammatically complete while relying on “this one” or “as before.” Restore enough context from the original or choose a different passage.
Keep qualifications that determine when the explanation applies. If the speaker says a setting works only for one input type, the condition belongs with the recommendation. The long-video clipping guide covers the additional editorial work needed when a passage will be published independently.
Mark each candidate as usable, needs a boundary change or unsuitable for this purpose. You do not need to keep every processed clip.
Worked example: preserve a complete lid-opening action
The following example is a constructed editing exercise. Suppose one product video contains a whole-cup view, a hand opening the lid, a handle close-up and a desk-use shot. The opening action runs across a point where a fixed interval would divide the source.
| Candidate | What you observe | Decision |
|---|---|---|
| Whole-cup view | The product is clear, with a small remnant of the previous shot at the beginning. | Refine the start before using it as an introduction. |
| First half of the opening action | The hand reaches for the lid, but the action stops before completion. | Do not treat it as a complete demonstration. |
| Second half of the opening action | The lid opens without the initial hand movement. | Recover a range that includes setup and completion. |
| Handle close-up | The handle detail is clear. | Keep it for a handle explanation, not the lid instruction. |
| Desk-use shot | The correct cup appears in an ordinary setting. | Keep it as contextual footage. |
Return to the original source to recover the complete opening action. Use the appropriate splitting approach or refine the range in editing. Verify the repaired clip in normal playback, rather than assuming that joining two outputs necessarily gives you a clean boundary.
For the next edit, name the clips by their roles: product overview, lid action, handle detail and desk context. That turns an unexplained output folder into material an editor can select for a script. The asset-based film creation workflow can then match those roles to the new video’s message.
Recover incomplete clips without losing the source context
Use the original recording to repair incomplete material. The missing setup or ending may exist just outside a candidate’s boundary, even when the exported clip itself cannot be extended.
Step 5: Decide whether to resplit or refine
Resplit when the chosen approach is unsuitable across much of the recording. Refine individual ranges when most candidates are useful and a few need attention. For precise timeline adjustments, use Super Editor.
A visual source with several distinct shots may benefit from transition-based splitting. A continuous product action interrupted by fixed intervals needs a range that respects the action. A spoken answer cut into grammatically awkward sections needs a meaning-oriented review, even if the original timing divisions are consistent.
Keep a short reason for each change: “restored the opening condition,” “included the hand reaching for the lid” or “removed the previous shot’s final frame.” This helps another editor understand the intended boundary when the clip is reused.
A new narration may require a different useful range from the original audio. Recheck clips in the new timeline rather than treating the splitting pass as permanent approval for every later use.
Organize retained shots for search and substitution
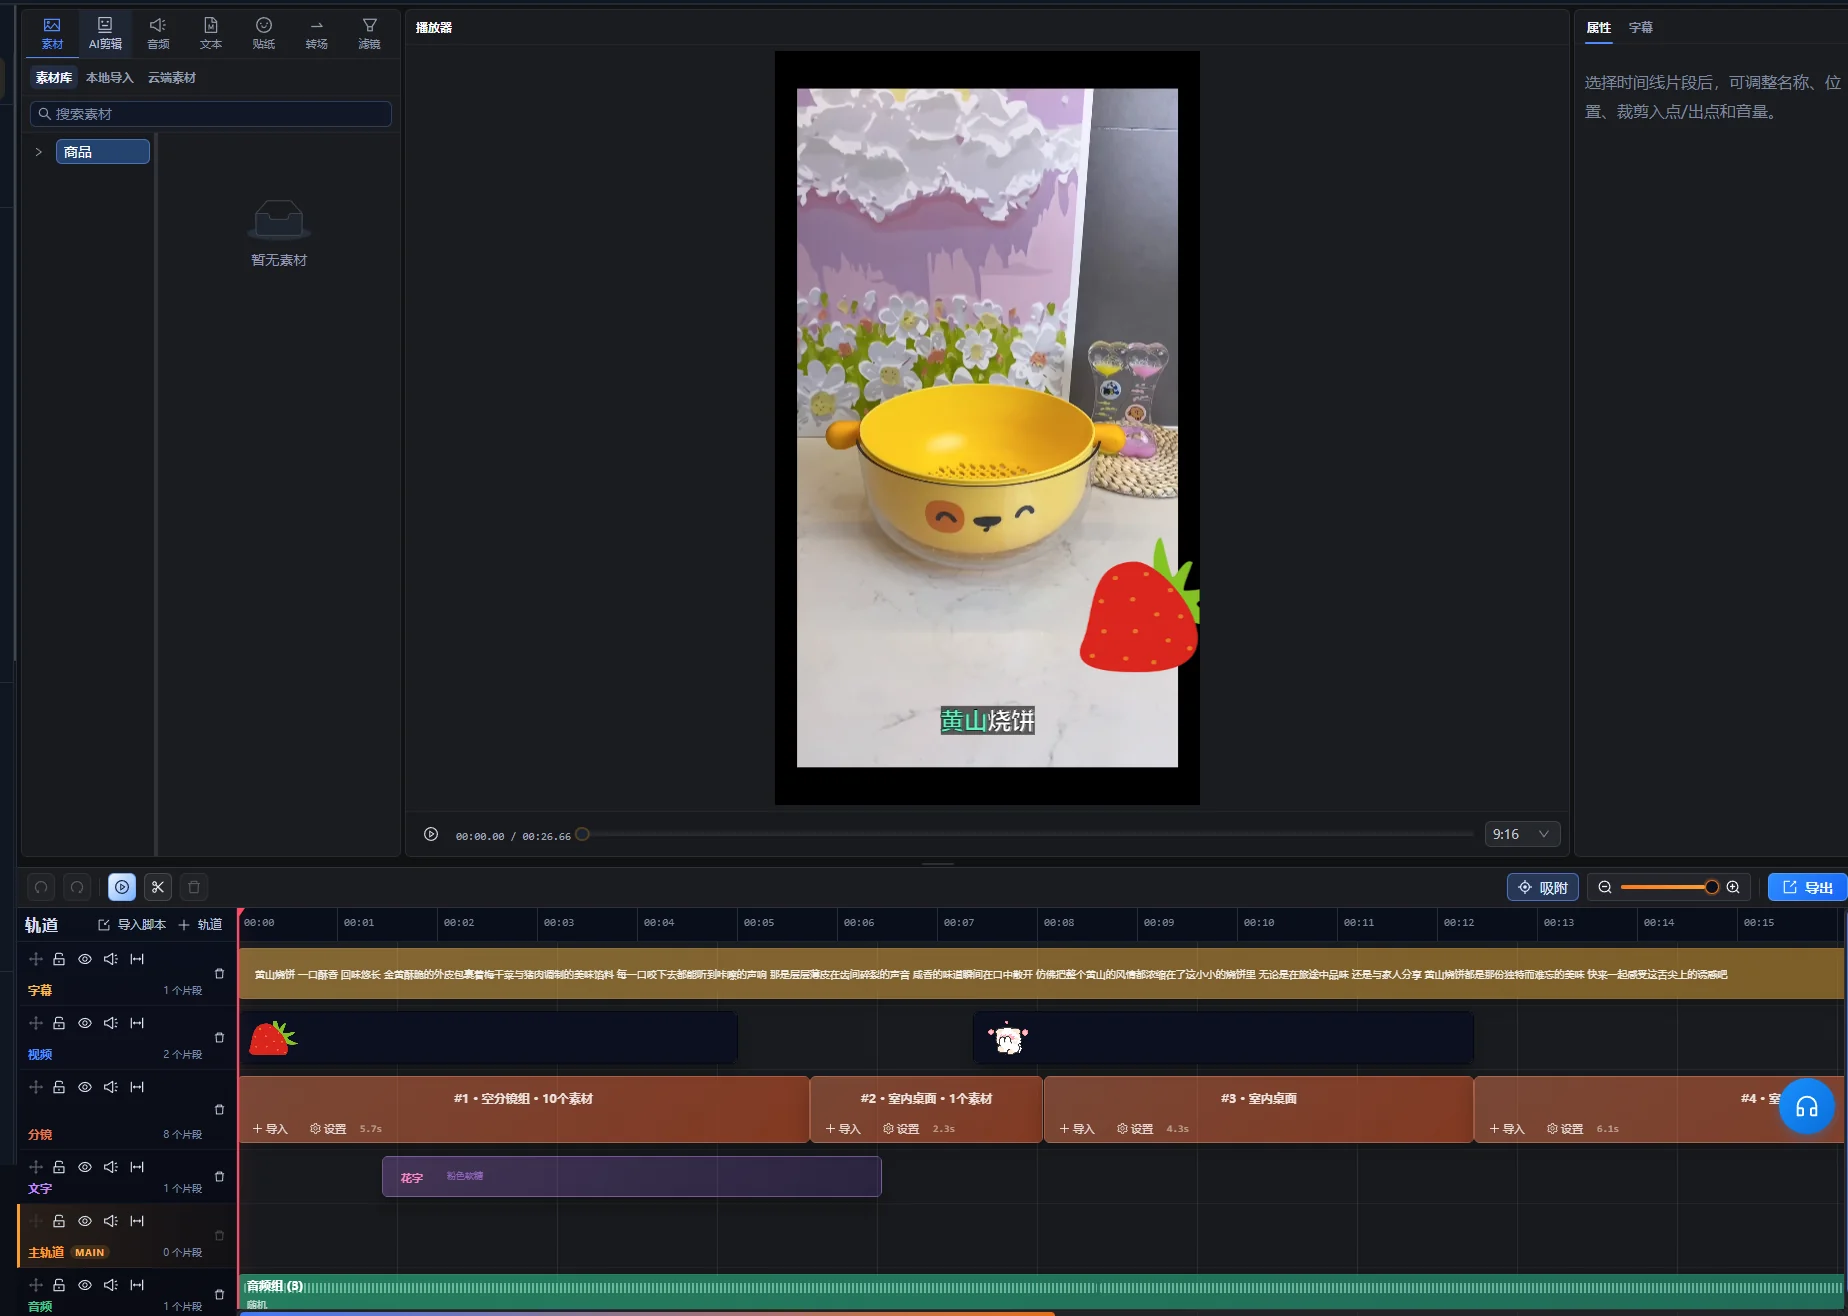
Name and group clips by the subject, action and setting they show, then preserve their original source references. A filename such as “cup-lid-opening” is more useful than a sequence of outputs whose content is only visible after playback.
- Identity: product, model, color or person.
- Action: opening, pouring, explaining or showing a detail.
- Context: desk, workshop, interview or outdoor setting.
- Source: original filename and the useful range.
- Restriction: missing setup, visible old label or another known limitation.
These are suggested editorial records, not a claim that every field is automatically stored by the client. Keep a simple index where necessary. Adobe’s media-bin guidance supports grouping source material and sequences as projects grow.
For a library workflow, consult the asset management guide and complete the preparation required for the selected material. For batch editing, group only clips that perform the same role under the same message. A handle shot and a lid-opening shot are related to one product, but they are not interchangeable demonstrations.
Troubleshoot unsuitable boundaries by inspecting the source
Diagnose what the cut interrupted before changing parameters. A visual-transition issue, a time-interval issue and a speech-context issue are different problems.
| Symptom | Possible explanation to check | Useful next step |
|---|---|---|
| An action is split across two files. | The chosen time interval crosses the action. | Recover a complete range from the source or use another approach. |
| An uninterrupted explanation remains one long clip. | There is no visual shot change at its topic boundaries. | Use a speech-oriented approach or choose ranges manually. |
| A clip begins with “that option.” | The preceding context was omitted. | Restore the relevant introduction or select a complete standalone passage. |
| A candidate contains a frame from another shot. | The selected boundary needs refinement. | Inspect the adjacent source frames and adjust the edge. |
| The useful audio is interrupted. | The cut is suitable visually but not for the spoken passage. | Review sound continuity and choose a range that preserves the required speech. |
| The output folder is difficult to reuse. | Clips lack descriptive names and source records. | Index the retained material by visual role and original range. |
If speech recognition affects the selection, compare the words with the recording, especially names, numbers and technical terms. Do not turn uncertain recognition into an approved caption. W3C’s caption guidance calls for synchronized information that conveys the meaningful audio content; text based on the wrong passage does not serve that purpose.
Approve reusable clips before moving to the next edit
A retained clip is ready for the next editing task when its useful content is complete, its limitations are known and you can locate the source. It is ready for publication only after the finished edit’s framing, audio and captions have also been checked.
- The opening supplies the setup or context the next use requires.
- The ending preserves the complete action or thought.
- Important speech is not clipped or changed in meaning.
- Unwanted adjacent-shot frames are removed.
- The subject and visible details match the clip label.
- The original source and useful range remain identifiable.
- The clip plays correctly and has a clear editorial role.
For publication, check the destination’s current export guidance. YouTube’s encoding recommendations, for example, address frame rate and delivery format. Splitting a source is a preparation step; it does not establish compliance with a publishing destination.
Start the next project with a handful of reviewed clips, then apply the same boundary rules to more material. The useful outcome is footage that supports a message, not simply a larger number of files.
Editorial basis: AIMIX Editorial Team prepared this guide using the current client workflow and linked primary documentation. The cup sequence and boundary defects are constructed examples, not a recorded client test or a claim about detection accuracy.
Frequently asked questions
Which splitting mode should I use for a talking-head video?
Start with a speech-oriented approach when complete spoken ideas are the priority. A continuous camera take may contain no visual transition at a topic boundary. Check recognition, context and the beginning and ending of every retained passage.
Can fixed-duration clips be used immediately in a batch?
Only after checking that each candidate performs the intended role. Equal length does not mean equal meaning: an action can cross an interval, and a short clip may omit its setup or completion. Review candidates with the narration they will accompany.
Should I delete the original after splitting?
Keep the original available while developing and reusing the clips. A later edit may need context or frames beyond an output boundary. Follow your own storage policy after confirming what must be retained for the project.
Does a complete split clip need captions?
That depends on its final use. A silent supporting shot inside a narrated edit differs from an independently published spoken clip. Review the finished video’s meaningful audio, caption accuracy and timing rather than deciding from the splitting mode alone.